


How to work with fondant for cakes? (Beginner’s Guide)


Beautiful, smooth fondant cakes are a delight. But where does one start to make them? Many feel this way. Fondant may seem tricky. However, with a few tips on working with fondant for cakes as a new decorator, beautiful DIY fondant cakes can be made in no time.
In this guide for beginners, learn the easy techniques for working with fondant as a total newcomer. This covers all the basics of fondant – from rolling and draping to decorating. Even pick the troubleshooting tips to avoid common fondant mistakes.
Whether one wants to learn working with fondant for cakes or just needs a fondant 101, this post has it covered!
Fondant Guide for Cakes
Fondant is a yummy dough that can be put on top of cakes and pastries. It is soft and stretchy, and can be rolled, cut, or shaped into different things. There are different types of fondant, like rolled fondant, fondant icing, and gum paste fondant. Rolled fondant is the most common. It is made with sugar, water, corn syrup, and sometimes gelatin or vanilla extract to make the fondant more elastic and colorful.
People who decorate cakes like fondant because it makes the cakes look smooth and pretty. Decorators can do fun things with it. The taste or color of the fondant can also be changed to match preferences. Here are some methods to modify the taste and color of the fondant:
➡️ To modify the taste, oils or extracts can be added to the fondant. For instance, vanilla, almond, lemon, or peppermint extract can give the fondant a different flavor.
➡️ To modify the color, gel or powder food coloring can be used to tint the fondant. The color can be kneaded into the fondant or painted on the surface with a brush. Different colors can also be mixed to create new shades.
What Tools Do I Need to Work with Fondant for Cakes?
Listen up bakers, it's time to get your fondant game on point! Working with that sugary play-doh can be tricky, but having the right tools in your arsenal makes it a piece of cake. Let me break down the fondant necessities:
First up, you need a rolling pin to flatten that fondant into submission. Go old school with a wooden pin or get fancy with a silicone one - either way, it'll roll your fondant smooth as butter. Pro tip: get one with adjustable rings to control thickness. You want your fondant thicc, not thiccc.
Next, grab a fondant smoother to iron out any bumps, wrinkles, or air bubbles in the fondant. This flat tool makes the surface flawless and helps the fondant really stick to the cake. Smoothing for the win!
Now for the fun part – cutters and embossers to make your fondant creations pop! We're talking sharp borders, beautiful ribbons, even 3D flowers and letters. Let your imagination run wild.
To take your designs up a notch, modeling tools are clutch for sculpting realistic details. With different shaped tips, you can craft some serious flower power, animals, faces - the sky's the limit!
Lastly, a detailing knife lets you get surgical with fondant trimming and carving. You'll be snipping away excess fondant and carving out teeny shapes in no time. It's the cherry on top for next-level decor.
With the right fondant tools, you'll be cranking out cakes that look almost too good to eat...almost!
How to work with fondant for cakes?
Working with fondant can be fun and rewarding, but it also requires some preparation and practice. Here are some steps to help you work with fondant for cakes and decorate with it.
1. Preparing your cake and buttercream
First, you need a cake that’s fit for its close up. Bake it, let it cool, and trim that beauty into a perfect, level shape. We’re talking precision, people. Then slather on a thin layer of buttercream over the entire cake. Use your spatula to spread it smooth like icing on a...well, cake! This “crumb coat” seals in loose crumbs and provides a flawless base for your fondant. Chill the cake for 15-20 minutes so the buttercream firms up.
While your cake takes a quick catnap in the fridge, it’s time to break out the fondant! Knead that sugary dough until it’s pliable yet still firm. Dust your countertop with powdered sugar and roll out the fondant 1/8 inch thick. Carefully drape the fondant over your cake, smoothing out air bubbles as you go. Trim off excess fondant around the base and you’re done. Your cake is ready for its close up!
2. Kneading and rolling out the fondant
Now you can grab ready-made fondant from the store, but I say make your own from scratch - it's cheaper and you control the flavor. Either way, knead that fondant first to soften it up!
Dust your counter with some powdered sugar and start working that fondant with your bare hands, stretching and folding like there's no tomorrow. Keep at it until fondant is elastic perfection.
Feeling daring? Add a few drops of gel food coloring and turn that fondant into your signature shade. Just slip on a pair of gloves first unless you want to be walking around with bright blue hands for a week!
Now for the fun part – rolling out the fondant. Start in the center and roll outwards, turning the fondant a quarter turn with each roll to keep things from sticking. Roll until the fondant is an eighth of an inch thick and big enough to drape dramatically over your cake.
You've now got a sheet of fondant ready to transform your cake into a showstopper! Use it to coat the cake for a smooth finish, cut out shapes to make an eye-catching collage, or get creative with ruffles, bows, and all kinds of over-the-top embellishments.
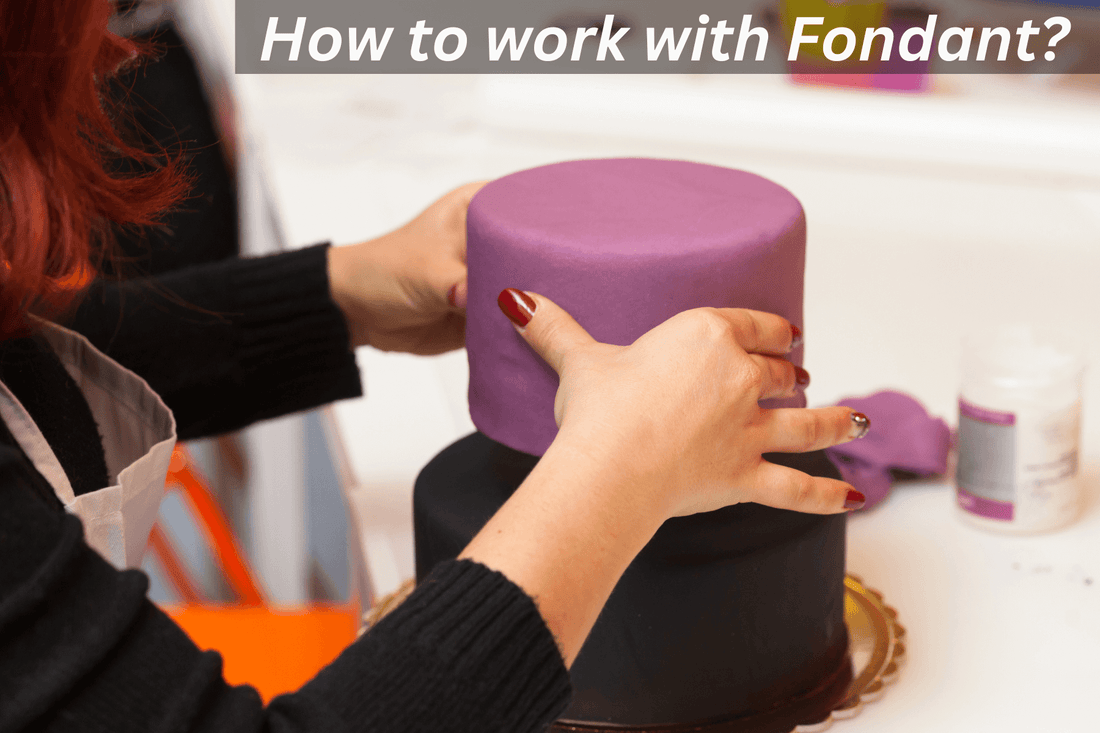
3. Covering the cake with fondant
There are two fab ways to drape your cake in fondant glamor. You can get hands-on and gently lift the fondant over your cake, draping it like a designer gown. Or, for you rollers out there, use a rolling pin to roll out the fondant into a perfect sheet before unrolling it over your cake. Either way, handle with care – we don’t want any tears or stretch marks! This fondant needs to look flawless.
With the fondant on, it’s time to work your magic. Start at the top, using your hands or a fondant smoother to press out air bubbles and create a seamless finish. Smooth your way down the sides of the cake, stretching and polishing as you go. Use your fingers or a knife to tuck any excess fondant under the base. Then, trim away any remaining excess fondant for a perfect fit. Roll out your fondant smoother one more time to buff the surface and achieve a high-shine glaze.
4. Decorating the cake with fondant
Alright home bakers, listen up! Now that your cake is all dressed up in its fancy fondant gown, it's time to bling it out with some rockin' decorations! We're talking next-level edible embellishments to take your cake from drab to fab.
First up, bust out those cookie cutters, fondant molds, and sculpting tools, because we're molding and shaping fondant into the hottest decor around. Think flowers, leaves, letters, bows—get creative! Sculpt some kawaii animals, your initials in cursive, even the Eiffel Tower if you're feeling adventurous! The sky's the limit with fondant, baby.
Next, it's time to glue those babies on. A dollop of buttercream, a splash of water, or a dab of edible glue will do the trick to adhere your creations. Just smear a little on the back and press gently into place. Voila!
But we're not stopping there. Sprinkles, pearls, candy, chocolate—pile it on! Just remember, too much weight can cause fondant to sink or melt, so decorate responsibly.
And let's finish off with some royal icing or buttercream piping. Outline those fondant figurines, add some swirls and dots for extra spice via icing tips and piping bags.
- Storing and serving the cake
Here's the scoop to keep that fondant frosting lookin' fab:
➜ Store it at room temp for up to 3 days if you didn't fill it with anything that spoils quick like custard or fresh fruit. We want to enjoy your masterpiece at its peak, not peeking with mold!
➜ Pop it in the fridge for up to a week if you wrap it up loose and easy in plastic wrap or a cake box. Gotta prevent that condensation from causin' trouble on your perfect fondant.
➜ When it's finally time to serve, go slow and steady with a sharp knife or slicer to cut neat slices. Carefully peel off the fondant before eating so your guests can enjoy the cake itself in all its glory. Some folks like the chewy fondant though, so no judgment if you wanna nibble it too.
➜ Leftover fondant keeps for later, just wrap it up tight and stash it somewhere dry at room temperature.
Conclusion
Well hiya there fondant fans! Looks like we've come to the sweet end of our yummy crash course on how to work with fondant for cakes.
Now remember, my cake-crafting cuties, when you're just starting out with fondant, don't fret about being fancy-schmancy. Just focus on getting those basic skills in your decorating toolbelt. Smoothly roll, gently cover, and bubble-bust your way to fondant success. Having the right fondant tools like rollers and cutters makes it a piece of cake too.
Now skedaddle on to the kitchen, whip up some colorful, textured fondant magic, and let your creativity shine, sugar!